(→List) |
(→List) |
||
| Line 14: | Line 14: | ||
==List== |
==List== |
||
{| border="2" cellpadding="2" cellspacing="2" class="article-table article-table-selected" style="height: 100%; width: 100%; " |
{| border="2" cellpadding="2" cellspacing="2" class="article-table article-table-selected" style="height: 100%; width: 100%; " |
||
| − | ! scope="col"|Name<br />( |
+ | ! scope="col"|Name<br />(Grade Type) |
! scope="col"|Image |
! scope="col"|Image |
||
! scope="col"|Obtained From |
! scope="col"|Obtained From |
||
! scope="col"|Recycling |
! scope="col"|Recycling |
||
|- |
|- |
||
| − | |Anti-inflammatory Tablets<br />(Anti-Inflammatory |
+ | |Anti-inflammatory Tablets<br />(Grade 1 Anti-Inflammatory) |
|[[File:Anti-inflammatory Tablets.jpg|200px]] |
|[[File:Anti-inflammatory Tablets.jpg|200px]] |
||
| − | |[[Scavenging]] |
+ | |Likely [[Scavenging]] Locations: |
| + | *[[Hospital (Location)]] |
||
|N/A |
|N/A |
||
|- |
|- |
||
| − | |Antiseptic<br />( |
+ | |Antiseptic<br />(Grade 1 Antiseptic ) |
|[[File:Antiseptic.jpg|200px]] |
|[[File:Antiseptic.jpg|200px]] |
||
| − | |[[Scavenging]] |
+ | |Likely [[Scavenging]] Locations: |
| + | *[[Hospital (Location)]] |
||
|N/A |
|N/A |
||
|- |
|- |
||
| − | |Bandage<br />( |
+ | |Bandage<br />(Grade 3 Bandage) |
|[[File:Bandage(Medical).jpg|200px]] |
|[[File:Bandage(Medical).jpg|200px]] |
||
|Can be [[Crafting|crafted]] at Level 3 [[Medical Bench]] using: |
|Can be [[Crafting|crafted]] at Level 3 [[Medical Bench]] using: |
||
*10 Threads |
*10 Threads |
||
*50 {{DzCloth}} |
*50 {{DzCloth}} |
||
| ⚫ | |||
| − | |||
| + | *[[Hospital (Location)]] |
||
| − | |||
| ⚫ | |||
| − | |||
| ⚫ | |||
|15 {{DzCloth}} |
|15 {{DzCloth}} |
||
|- |
|- |
||
| − | |Brace<br />( |
+ | |Brace<br />(Grade 3 Brace) |
|[[File:Brace.jpg|200px]] |
|[[File:Brace.jpg|200px]] |
||
|Can be [[Crafting|crafted]] at Level 3 [[Medical Bench]] using: |
|Can be [[Crafting|crafted]] at Level 3 [[Medical Bench]] using: |
||
| Line 46: | Line 47: | ||
*3 Straps |
*3 Straps |
||
*50 {{DzCloth}} |
*50 {{DzCloth}} |
||
| ⚫ | |||
| − | |||
| + | *[[Hospital (Location)]] |
||
| − | |||
| − | |||
| ⚫ | |||
|1 Thread<br />10 {{DzCloth}} |
|1 Thread<br />10 {{DzCloth}} |
||
|- |
|- |
||
| − | |Burn Dressing<br />(Burn Dressing |
+ | |Burn Dressing<br />(Grade 1 Burn Dressing) |
|[[File:Mpv9FU5.png|200px]] |
|[[File:Mpv9FU5.png|200px]] |
||
| − | |[[Scavenging]] |
+ | |Likely [[Scavenging]] Locations: |
| + | *[[Hospital (Location)]] |
||
|N/A |
|N/A |
||
|- |
|- |
||
| − | |Cheap Medical Tape<br />(Medical Tape |
+ | |Cheap Medical Tape<br />(Grade 2 Medical Tape) |
|[[File:Cheap Medical Tape.jpg|200px]] |
|[[File:Cheap Medical Tape.jpg|200px]] |
||
| − | |[[Scavenging]] |
+ | |Likely [[Scavenging]] Locations: |
| + | *[[Hospital (Location)]] |
||
|N/A |
|N/A |
||
|- |
|- |
||
| − | |Extra-Strong Medical Tape<br />(Medical Tape |
+ | |Extra-Strong Medical Tape<br />(Grade 5 Medical Tape) |
|[[File:Extra-Strong Medical Tape.jpg|200px]] |
|[[File:Extra-Strong Medical Tape.jpg|200px]] |
||
| − | |[[Scavenging]] |
+ | |Likely [[Scavenging]] Locations: |
| + | *[[Hospital (Location)]] |
||
|N/A |
|N/A |
||
|- |
|- |
||
| − | |Extra-Strong Sling<br />( |
+ | |Extra-Strong Sling<br />(Grade 5 Sling) |
|[[File:Extra-Strong Sling.jpg|200px]] |
|[[File:Extra-Strong Sling.jpg|200px]] |
||
| − | |[[Scavenging]] |
+ | |Likely [[Scavenging]] Locations: |
| + | *[[Hospital (Location)]] |
||
|20 {{DzCloth}} |
|20 {{DzCloth}} |
||
|- |
|- |
||
| − | |Gauze<br />( |
+ | |Gauze<br />(Grade 3 Gauze) |
|[[File:Gauze(Medical).jpg|200px]] |
|[[File:Gauze(Medical).jpg|200px]] |
||
|Can be [[Crafting|crafted]] at Level 3 [[Medical Bench]] using: |
|Can be [[Crafting|crafted]] at Level 3 [[Medical Bench]] using: |
||
*10 Threads |
*10 Threads |
||
*50 {{DzCloth}} |
*50 {{DzCloth}} |
||
| ⚫ | |||
| − | |||
| + | *[[Hospital (Location)]] |
||
| − | |||
| ⚫ | |||
| − | |||
| ⚫ | |||
|15 {{DzCloth}} |
|15 {{DzCloth}} |
||
|- |
|- |
||
| − | |Heavy Bandage<br />( |
+ | |Heavy Bandage<br />(Grade 5 Bandage) |
|[[File:Heavy Bandage.jpg|200px]] |
|[[File:Heavy Bandage.jpg|200px]] |
||
| − | |[[Scavenging]] |
+ | |Likely [[Scavenging]] Locations: |
| + | *[[Hospital (Location)]] |
||
|TBA |
|TBA |
||
|- |
|- |
||
| − | |Heavy Brace<br />( |
+ | |Heavy Brace<br />(Grade 5 Brace) |
|[[File:Heavy Brace.jpg|200px]] |
|[[File:Heavy Brace.jpg|200px]] |
||
| − | |[[Scavenging]] |
+ | |Likely [[Scavenging]] Locations: |
| + | *[[Hospital (Location)]] |
||
|20 {{DzCloth}}<br />2 Strap |
|20 {{DzCloth}}<br />2 Strap |
||
|- |
|- |
||
| − | |Heavy Gauze<br />( |
+ | |Heavy Gauze<br />(Grade 5 Gauze) |
|[[File:Heavy Gauze.jpg|200px]] |
|[[File:Heavy Gauze.jpg|200px]] |
||
| − | |[[Scavenging]] |
+ | |Likely [[Scavenging]] Locations: |
| + | *[[Hospital (Location)]] |
||
|25 {{DzCloth}} |
|25 {{DzCloth}} |
||
|- |
|- |
||
| − | |Heavy Splint<br />( |
+ | |Heavy Splint<br />(Grade 5 Splint) |
|[[File:Heavy Splint.jpg|200px]] |
|[[File:Heavy Splint.jpg|200px]] |
||
| − | |[[Scavenging]] |
+ | |Likely [[Scavenging]] Locations: |
| + | *[[Hospital (Location)]] |
||
|25 {{DzWood}}<br />25 {{DzCloth}} |
|25 {{DzWood}}<br />25 {{DzCloth}} |
||
|- |
|- |
||
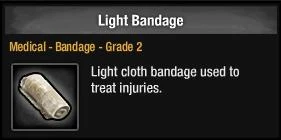
| − | |Light Bandage<br />( |
+ | |Light Bandage<br />(Grade 2 Bandage) |
|[[File:Light Bandage.jpg|200px]] |
|[[File:Light Bandage.jpg|200px]] |
||
|Can be [[Crafting|crafted]] at Level 2 [[Medical Bench]] using: |
|Can be [[Crafting|crafted]] at Level 2 [[Medical Bench]] using: |
||
*5 Threads |
*5 Threads |
||
*25 {{DzCloth}} |
*25 {{DzCloth}} |
||
| ⚫ | |||
| − | |||
| + | *[[Hospital (Location)]] |
||
| − | |||
| − | |||
| ⚫ | |||
|10 {{DzCloth}} |
|10 {{DzCloth}} |
||
|- |
|- |
||
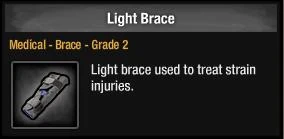
| − | |Light Brace<br />( |
+ | |Light Brace<br />(Grade 2 Brace) |
|[[File:Light Brace.jpg|200px]] |
|[[File:Light Brace.jpg|200px]] |
||
|Can be [[Crafting|crafted]] at Level 2 [[Medical Bench]] using: |
|Can be [[Crafting|crafted]] at Level 2 [[Medical Bench]] using: |
||
*25 {{DzCloth}} |
*25 {{DzCloth}} |
||
*25 {{DzWood}} |
*25 {{DzWood}} |
||
| ⚫ | |||
| − | |||
| + | *[[Hospital (Location)]] |
||
| − | |||
| − | |||
| ⚫ | |||
|TBA |
|TBA |
||
|- |
|- |
||
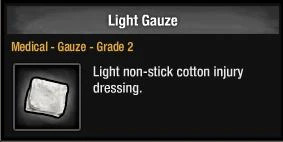
| − | |Light Gauze<br />( |
+ | |Light Gauze<br />(Grade 2 Gauze) |
|[[File:Light Gauze.jpg|200px]] |
|[[File:Light Gauze.jpg|200px]] |
||
|Can be [[Crafting|crafted]] at Level 2 [[Medical Bench]] using: |
|Can be [[Crafting|crafted]] at Level 2 [[Medical Bench]] using: |
||
*5 Threads |
*5 Threads |
||
*25 {{DzCloth}} |
*25 {{DzCloth}} |
||
| ⚫ | |||
| − | |||
| + | *[[Hospital (Location)]] |
||
| − | |||
| − | |||
| ⚫ | |||
|10 {{DzCloth}} |
|10 {{DzCloth}} |
||
|- |
|- |
||
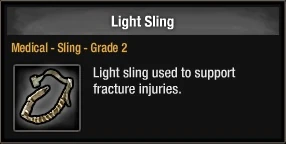
| − | |Light Sling<br />( |
+ | |Light Sling<br />(Grade 2 Sling) |
|[[File:Light Sling.jpg|200px]] |
|[[File:Light Sling.jpg|200px]] |
||
|Can be [[Crafting|crafted]] at Level 2 [[Medical Bench]] using: |
|Can be [[Crafting|crafted]] at Level 2 [[Medical Bench]] using: |
||
*1 Rope |
*1 Rope |
||
*25 {{DzCloth}} |
*25 {{DzCloth}} |
||
| ⚫ | |||
| − | |||
| + | *[[Hospital (Location)]] |
||
| − | |||
| − | |||
| ⚫ | |||
|10 {{DzCloth}} |
|10 {{DzCloth}} |
||
|- |
|- |
||
| − | |Light Splint<br />( |
+ | |Light Splint<br />(Grade 2 Splint) |
|[[File:Light Splint.jpg|200px]] |
|[[File:Light Splint.jpg|200px]] |
||
|Can be [[Crafting|crafted]] at Level 2 [[Medical Bench]] using: |
|Can be [[Crafting|crafted]] at Level 2 [[Medical Bench]] using: |
||
*15 {{DzMetal}} |
*15 {{DzMetal}} |
||
*15 {{DzCloth}} |
*15 {{DzCloth}} |
||
| ⚫ | |||
| − | |||
| + | *[[Hospital (Location)]] |
||
| − | |||
| − | |||
| ⚫ | |||
|5 {{DzMetal}}<br />5 {{DzCloth}} |
|5 {{DzMetal}}<br />5 {{DzCloth}} |
||
|- |
|- |
||
| − | |Makeshift Bandage<br />( |
+ | |Makeshift Bandage<br />(Grade 1 Bandage) |
|[[File:Makeshift Bandage.jpg|200px]] |
|[[File:Makeshift Bandage.jpg|200px]] |
||
| − | |Can be [[Crafting|crafted]] at Level 1 [[Medical Bench]] using 15 {{DzCloth}}<br />[[Scavenging]] |
+ | |Can be [[Crafting|crafted]] at Level 1 [[Medical Bench]] using 15 {{DzCloth}}<br />Likely [[Scavenging]] Locations: |
| + | *[[Hospital (Location)]] |
||
|5 {{DzCloth}} |
|5 {{DzCloth}} |
||
|- |
|- |
||
| − | |Makeshift Brace<br />( |
+ | |Makeshift Brace<br />(Grade 1 Brace) |
|[[File:Makeshift Brace.jpg|200px]] |
|[[File:Makeshift Brace.jpg|200px]] |
||
|Can be [[Crafting|crafted]] at Level 1 [[Medical Bench]] using: |
|Can be [[Crafting|crafted]] at Level 1 [[Medical Bench]] using: |
||
*15 {{DzWood}} |
*15 {{DzWood}} |
||
*15 {{DzCloth}} |
*15 {{DzCloth}} |
||
| ⚫ | |||
| − | |||
| + | *[[Hospital (Location)]] |
||
| − | |||
| − | |||
| ⚫ | |||
|5 {{DzWood}}<br />5 {{DzCloth}} |
|5 {{DzWood}}<br />5 {{DzCloth}} |
||
|- |
|- |
||
| − | |Makeshift Gauze<br />( |
+ | |Makeshift Gauze<br />(Grade 1 Gauze) |
|[[File:Makeshift Gauze.jpg|200px]] |
|[[File:Makeshift Gauze.jpg|200px]] |
||
| − | |Can be [[Crafting|crafted]] at Level 1 [[Medical Bench]] using 15 {{DzCloth}}<br />[[Scavenging]] |
+ | |Can be [[Crafting|crafted]] at Level 1 [[Medical Bench]] using 15 {{DzCloth}}<br />Likely [[Scavenging]] Locations: |
| + | *[[Hospital (Location)]] |
||
|5 {{DzCloth}} |
|5 {{DzCloth}} |
||
|- |
|- |
||
| − | |Makeshift Sling<br />( |
+ | |Makeshift Sling<br />(Grade 1 Sling) |
|[[File:Makeshift Sling.jpg|200px]] |
|[[File:Makeshift Sling.jpg|200px]] |
||
|Can be [[Crafting|crafted]] at Level 1 [[Medical Bench]] using: |
|Can be [[Crafting|crafted]] at Level 1 [[Medical Bench]] using: |
||
*1 Rope |
*1 Rope |
||
*15 {{DzCloth}} |
*15 {{DzCloth}} |
||
| ⚫ | |||
| − | |||
| + | *[[Hospital (Location)]] |
||
| − | |||
| − | |||
| ⚫ | |||
|5 {{DzCloth}} |
|5 {{DzCloth}} |
||
|- |
|- |
||
| − | |Makeshift Splint<br />( |
+ | |Makeshift Splint<br />(Grade 1 Splint) |
|[[File:Makeshift Splint.jpg|200px]] |
|[[File:Makeshift Splint.jpg|200px]] |
||
| − | |Can be [[Crafting|crafted]] at Level 1 [[Medical Bench]] using 15 {{DzWood}}<br />[[Scavenging]] |
+ | |Can be [[Crafting|crafted]] at Level 1 [[Medical Bench]] using 15 {{DzWood}}<br />Likely [[Scavenging]] Locations: |
| + | *[[Hospital (Location)]] |
||
|5 {{DzWood}} |
|5 {{DzWood}} |
||
|- |
|- |
||
| − | |Medical Tape<br />(Medical Tape |
+ | |Medical Tape<br />(Grade 3 Medical Tape) |
|[[File:Medical Tape(Medical).jpg|200px]] |
|[[File:Medical Tape(Medical).jpg|200px]] |
||
| − | |[[Scavenging]] |
+ | |Likely [[Scavenging]] Locations: |
| + | *[[Hospital (Location)]] |
||
| + | Recycling [[Medical Kit]]s |
||
|N/A |
|N/A |
||
|- |
|- |
||
| − | |Pain Killers<br />(Pain Killers |
+ | |Pain Killers<br />(Grade 1 Pain Killers) |
|[[File:Pain Killers.jpg|200px]] |
|[[File:Pain Killers.jpg|200px]] |
||
| − | |[[Scavenging]] |
+ | |Likely [[Scavenging]] Locations: |
| + | *[[Hospital (Location)]] |
||
|N/A |
|N/A |
||
|- |
|- |
||
| − | |Sling<br />( |
+ | |Sling<br />(Grade 3 Sling) |
|[[File:Sling.jpg|200px]] |
|[[File:Sling.jpg|200px]] |
||
|Can be [[Crafting|crafted]] at Level 3 [[Medical Bench]] using: |
|Can be [[Crafting|crafted]] at Level 3 [[Medical Bench]] using: |
||
*5 Threads |
*5 Threads |
||
*50 {{DzCloth}} |
*50 {{DzCloth}} |
||
| ⚫ | |||
| − | |||
| + | *[[Hospital (Location)]] |
||
| − | |||
| − | |||
| ⚫ | |||
|15 {{DzCloth}} |
|15 {{DzCloth}} |
||
|- |
|- |
||
| − | |Splint<br />( |
+ | |Splint<br />(Grade 3 Splint) |
|[[File:Splint.jpg|200px]] |
|[[File:Splint.jpg|200px]] |
||
|Can be [[Crafting|crafted]] at Level 3 [[Medical Bench]] using: |
|Can be [[Crafting|crafted]] at Level 3 [[Medical Bench]] using: |
||
*25 {{DzMetal}} |
*25 {{DzMetal}} |
||
*25 {{DzCloth}} |
*25 {{DzCloth}} |
||
| ⚫ | |||
| − | |||
| + | *[[Hospital (Location)]] |
||
| − | |||
| − | |||
| ⚫ | |||
|10 {{DzMetal}}<br />10 {{DzCloth}} |
|10 {{DzMetal}}<br />10 {{DzCloth}} |
||
|- |
|- |
||
| − | |Strong Sling<br />( |
+ | |Strong Sling<br />(Grade 4 Sling) |
|[[File:Strong Sling.jpg|200px]] |
|[[File:Strong Sling.jpg|200px]] |
||
|Can be [[Crafting|crafted]] at Level 4 [[Medical Bench]] (also requires Level 8 [[Medic]]) using: |
|Can be [[Crafting|crafted]] at Level 4 [[Medical Bench]] (also requires Level 8 [[Medic]]) using: |
||
| Line 234: | Line 228: | ||
*10 Threads |
*10 Threads |
||
*10 {{DzFuel}} |
*10 {{DzFuel}} |
||
| ⚫ | |||
| − | |||
| + | *[[Hospital (Location)]] |
||
| − | |||
| − | |||
| ⚫ | |||
|15 {{DzCloth}} |
|15 {{DzCloth}} |
||
|- |
|- |
||
| − | |Thick Bandage<br />( |
+ | |Thick Bandage<br />(Grade 4 Bandage) |
|[[File:Thick Bandage.jpg|200px]] |
|[[File:Thick Bandage.jpg|200px]] |
||
|Can be [[Crafting|crafted]] at Level 4 [[Medical Bench]] (also requires Level 8 [[Medic]]) using: |
|Can be [[Crafting|crafted]] at Level 4 [[Medical Bench]] (also requires Level 8 [[Medic]]) using: |
||
| Line 246: | Line 238: | ||
*15 Threads |
*15 Threads |
||
*10 {{DzFuel}} |
*10 {{DzFuel}} |
||
| ⚫ | |||
| − | |||
| + | *[[Hospital (Location)]] |
||
| − | |||
| − | |||
| ⚫ | |||
|15 {{DzCloth}} |
|15 {{DzCloth}} |
||
|- |
|- |
||
| − | |Thick Brace<br />( |
+ | |Thick Brace<br />(Grade 4 Brace) |
|[[File:Thick Brace.jpg|200px]] |
|[[File:Thick Brace.jpg|200px]] |
||
|Can be [[Crafting|crafted]] at Level 4 [[Medical Bench]] (also requires Level 8 [[Medic]]) using: |
|Can be [[Crafting|crafted]] at Level 4 [[Medical Bench]] (also requires Level 8 [[Medic]]) using: |
||
| Line 258: | Line 248: | ||
*5 Straps |
*5 Straps |
||
*10 {{DzFuel}} |
*10 {{DzFuel}} |
||
| ⚫ | |||
| − | |||
| + | *[[Hospital (Location)]] |
||
| − | |||
| − | |||
| ⚫ | |||
|15 {{DzCloth}}<br />1 Strap |
|15 {{DzCloth}}<br />1 Strap |
||
|- |
|- |
||
| − | |Thick Gauze<br />( |
+ | |Thick Gauze<br />(Grade 4 Gauze) |
|[[File:Thick Gauze.jpg|200px]] |
|[[File:Thick Gauze.jpg|200px]] |
||
|Can be [[Crafting|crafted]] at Level 4 [[Medical Bench]] (also requires Level 8 [[Medic]]) using: |
|Can be [[Crafting|crafted]] at Level 4 [[Medical Bench]] (also requires Level 8 [[Medic]]) using: |
||
| Line 270: | Line 258: | ||
*15 Threads |
*15 Threads |
||
*10 {{DzFuel}} |
*10 {{DzFuel}} |
||
| + | Likely [[Scavenging]] Locations: |
||
| − | |||
| + | *[[Hospital (Location)]] |
||
| − | |||
| − | |||
| ⚫ | |||
|TBA |
|TBA |
||
|- |
|- |
||
| − | |Thick Splint<br />( |
+ | |Thick Splint<br />(Grade 4 Splint) |
|[[File:Thick Splint.jpg|200px]] |
|[[File:Thick Splint.jpg|200px]] |
||
|Can be [[Crafting|crafted]] at Level 4 [[Medical Bench]] (also requires Level 8 [[Medic]]) using: |
|Can be [[Crafting|crafted]] at Level 4 [[Medical Bench]] (also requires Level 8 [[Medic]]) using: |
||
| Line 282: | Line 268: | ||
*1 Treated Wood |
*1 Treated Wood |
||
*10 {{DzFuel}} |
*10 {{DzFuel}} |
||
| + | Likely [[Scavenging]] Locations: |
||
| − | |||
| + | *[[Hospital (Location)]] |
||
| − | |||
| − | |||
| ⚫ | |||
|TBA |
|TBA |
||
|- |
|- |
||
| − | |Weak Medical Tape<br />(Medical Tape |
+ | |Weak Medical Tape<br />(Grade 1 Medical Tape) |
|[[File:Weak Medical Tape.jpg|200px]] |
|[[File:Weak Medical Tape.jpg|200px]] |
||
| − | |[[Scavenging]] |
+ | |Likely [[Scavenging]] Locations: |
| + | *[[Hospital (Location)]] |
||
|N/A |
|N/A |
||
|} |
|} |
||
Revision as of 15:53, 18 May 2013
Medical Items are a special type of item featured in The Last Stand: Dead Zone.
Background
There are hundreds of different kinds of injuries that can be suffered by the human body, most of which impair the capabilities of the wounded person and require specialized equipment and supplies in order to be properly treated. These items, combined with someone trained in their proper usage, are especially valuable in the harsh environment of the Dead Zone, where the risk of injury is ever present and even the slightest impairment can cost someone their life.
Effect
Medical Items are used to treat injuries. What injuries can be treated by a specific Medical item is determined by its type and Grade.
How to Obtain
- They can be scavenged during missions.
- They can be crafted at a Medical Bench. Higher end ones may require a Medic of a certain level as well.
- They can be purchased with Fuel in The Store.
List
| Name (Grade Type) |
Image | Obtained From | Recycling |
|---|---|---|---|
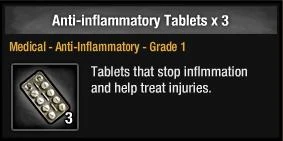
| Anti-inflammatory Tablets (Grade 1 Anti-Inflammatory) |
|
Likely Scavenging Locations: | N/A |
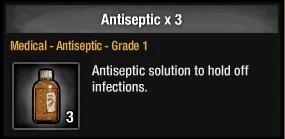
| Antiseptic (Grade 1 Antiseptic ) |
|
Likely Scavenging Locations: | N/A |
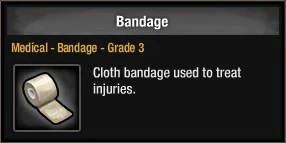
| Bandage (Grade 3 Bandage) |
|
Can be crafted at Level 3 Medical Bench using:
Likely Scavenging Locations: Recycling Medical Kits |
15 |
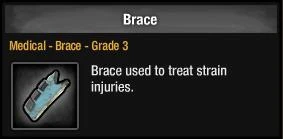
| Brace (Grade 3 Brace) |
|
Can be crafted at Level 3 Medical Bench using:
Likely Scavenging Locations: |
1 Thread 10 |
| Burn Dressing (Grade 1 Burn Dressing) |
File:Mpv9FU5.png | Likely Scavenging Locations: | N/A |
| Cheap Medical Tape (Grade 2 Medical Tape) |
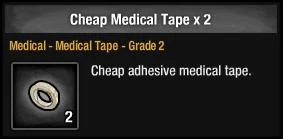
|
Likely Scavenging Locations: | N/A |
| Extra-Strong Medical Tape (Grade 5 Medical Tape) |
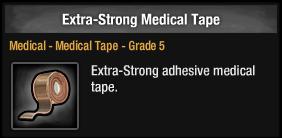
|
Likely Scavenging Locations: | N/A |
| Extra-Strong Sling (Grade 5 Sling) |
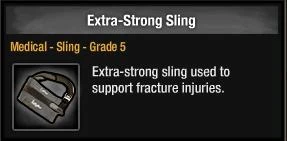
|
Likely Scavenging Locations: | 20 |
| Gauze (Grade 3 Gauze) |
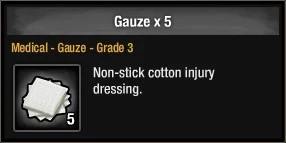
|
Can be crafted at Level 3 Medical Bench using:
Likely Scavenging Locations: Recycling First Aid Kits or Medical Kits |
15 |
| Heavy Bandage (Grade 5 Bandage) |
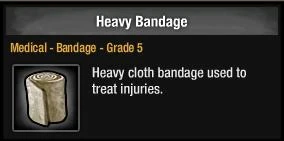
|
Likely Scavenging Locations: | TBA |
| Heavy Brace (Grade 5 Brace) |
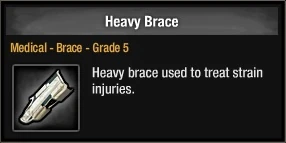
|
Likely Scavenging Locations: | 20 2 Strap |
| Heavy Gauze (Grade 5 Gauze) |
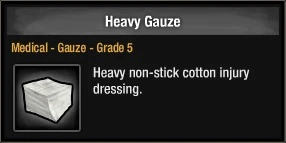
|
Likely Scavenging Locations: | 25 |
| Heavy Splint (Grade 5 Splint) |
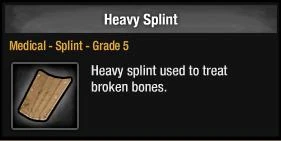
|
Likely Scavenging Locations: | 25 25 |
| Light Bandage (Grade 2 Bandage) |
|
Can be crafted at Level 2 Medical Bench using:
Likely Scavenging Locations: |
10 |
| Light Brace (Grade 2 Brace) |
|
Can be crafted at Level 2 Medical Bench using:
Likely Scavenging Locations: |
TBA |
| Light Gauze (Grade 2 Gauze) |
|
Can be crafted at Level 2 Medical Bench using:
Likely Scavenging Locations: |
10 |
| Light Sling (Grade 2 Sling) |
|
Can be crafted at Level 2 Medical Bench using:
Likely Scavenging Locations: |
10 |
| Light Splint (Grade 2 Splint) |
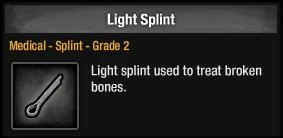
|
Can be crafted at Level 2 Medical Bench using:
Likely Scavenging Locations: |
5 5 |
| Makeshift Bandage (Grade 1 Bandage) |
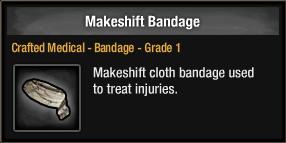
|
Can be crafted at Level 1 Medical Bench using 15 Likely Scavenging Locations: |
5 |
| Makeshift Brace (Grade 1 Brace) |
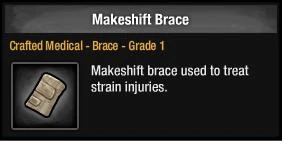
|
Can be crafted at Level 1 Medical Bench using:
Likely Scavenging Locations: |
5 5 |
| Makeshift Gauze (Grade 1 Gauze) |
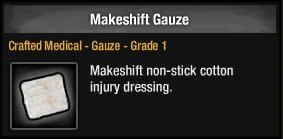
|
Can be crafted at Level 1 Medical Bench using 15 Likely Scavenging Locations: |
5 |
| Makeshift Sling (Grade 1 Sling) |
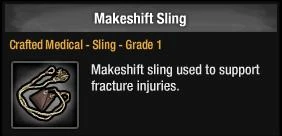
|
Can be crafted at Level 1 Medical Bench using:
Likely Scavenging Locations: |
5 |
| Makeshift Splint (Grade 1 Splint) |
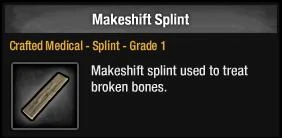
|
Can be crafted at Level 1 Medical Bench using 15 Likely Scavenging Locations: |
5 |
| Medical Tape (Grade 3 Medical Tape) |
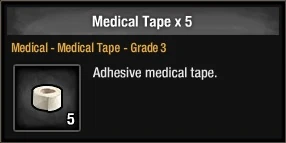
|
Likely Scavenging Locations:
Recycling Medical Kits |
N/A |
| Pain Killers (Grade 1 Pain Killers) |
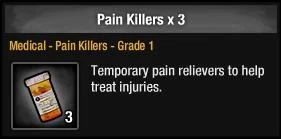
|
Likely Scavenging Locations: | N/A |
| Sling (Grade 3 Sling) |
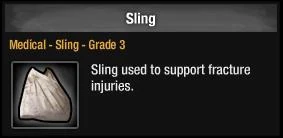
|
Can be crafted at Level 3 Medical Bench using:
Likely Scavenging Locations: |
15 |
| Splint (Grade 3 Splint) |
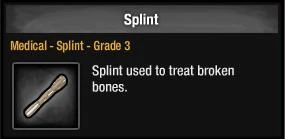
|
Can be crafted at Level 3 Medical Bench using:
Likely Scavenging Locations: |
10 10 |
| Strong Sling (Grade 4 Sling) |
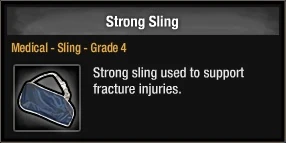
|
Can be crafted at Level 4 Medical Bench (also requires Level 8 Medic) using:
Likely Scavenging Locations: |
15 |
| Thick Bandage (Grade 4 Bandage) |
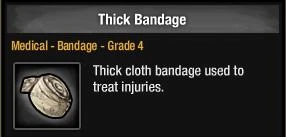
|
Can be crafted at Level 4 Medical Bench (also requires Level 8 Medic) using:
Likely Scavenging Locations: |
15 |
| Thick Brace (Grade 4 Brace) |
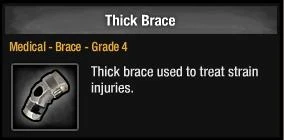
|
Can be crafted at Level 4 Medical Bench (also requires Level 8 Medic) using:
Likely Scavenging Locations: |
15 1 Strap |
| Thick Gauze (Grade 4 Gauze) |
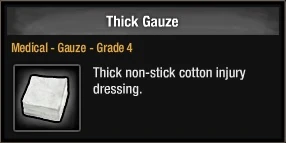
|
Can be crafted at Level 4 Medical Bench (also requires Level 8 Medic) using:
Likely Scavenging Locations: |
TBA |
| Thick Splint (Grade 4 Splint) |
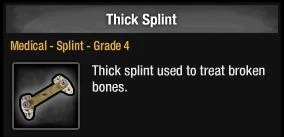
|
Can be crafted at Level 4 Medical Bench (also requires Level 8 Medic) using:
Likely Scavenging Locations: |
TBA |
| Weak Medical Tape (Grade 1 Medical Tape) |
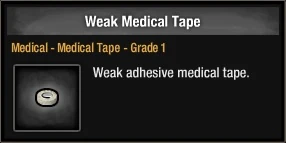
|
Likely Scavenging Locations: | N/A |